Restorative yoga sequence
A simple 15-minute restorative yoga practice to de-stress and unwind. By Marie Belle
In this busy, hectic world we all need time to relax and unwind. This short yoga sequence is easy to do and will calm your body and mind. You can add it to the end of your normal practice as a way to centre yourself and cool down. Or you can do this practice anytime you need a calming influence during the day to ease stress and bring a relaxing energy back into your life. This combination of breath and movement soothes the nervous system and quiets your mind. You’ll need a mat, yoga blocks, and access to a wall for this relaxing practice.
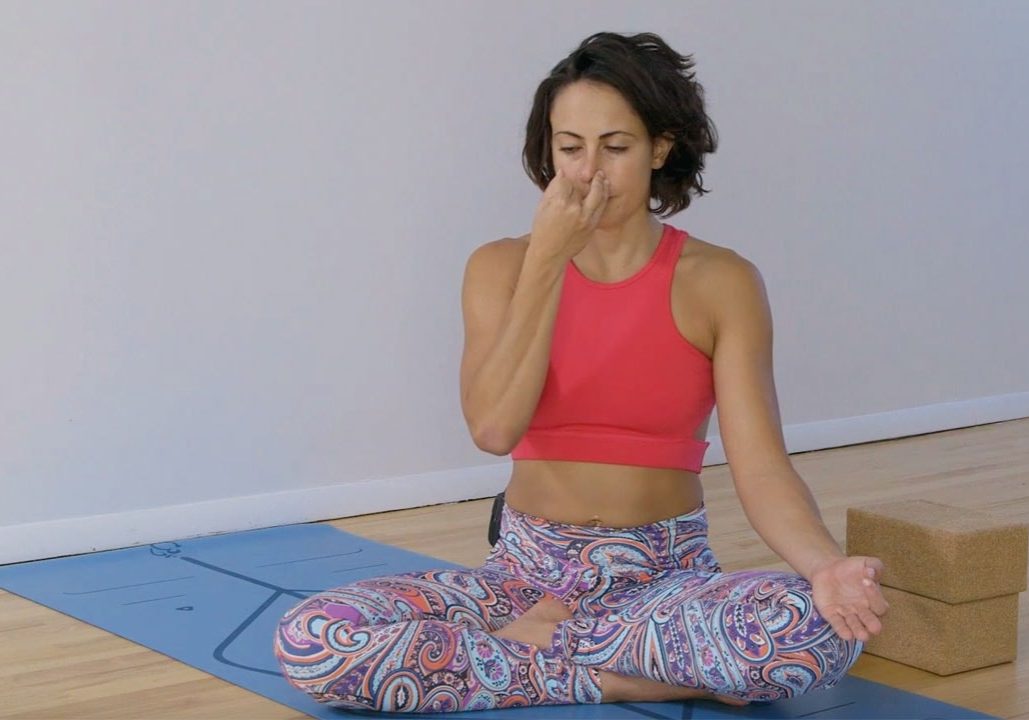
1. Nadi Shodhana (Alternate Nostril Breathing)
We’ll start with some breathwork to relax your nervous system.
Sit comfortably with your spine straight and your chest lifted. Bring the tip of your thumb and index finger together on your left hand with the rest of the fingers extended in Gyana Mudra. Rest your hand on your left knee.
With the right hand, fold your index and middle fingers down so they’re pointing toward the wrist. Use your thumb to block the right nostril. Inhale through your left nostril. Release the right nostril and use the ring finger to block the left nostril. Exhale through the right nostril.
Continue like this alternating breathing through your left and right nostrils for 10 breaths.
Switch sides so you’re starting on the other side and then continue for 10 more breaths.
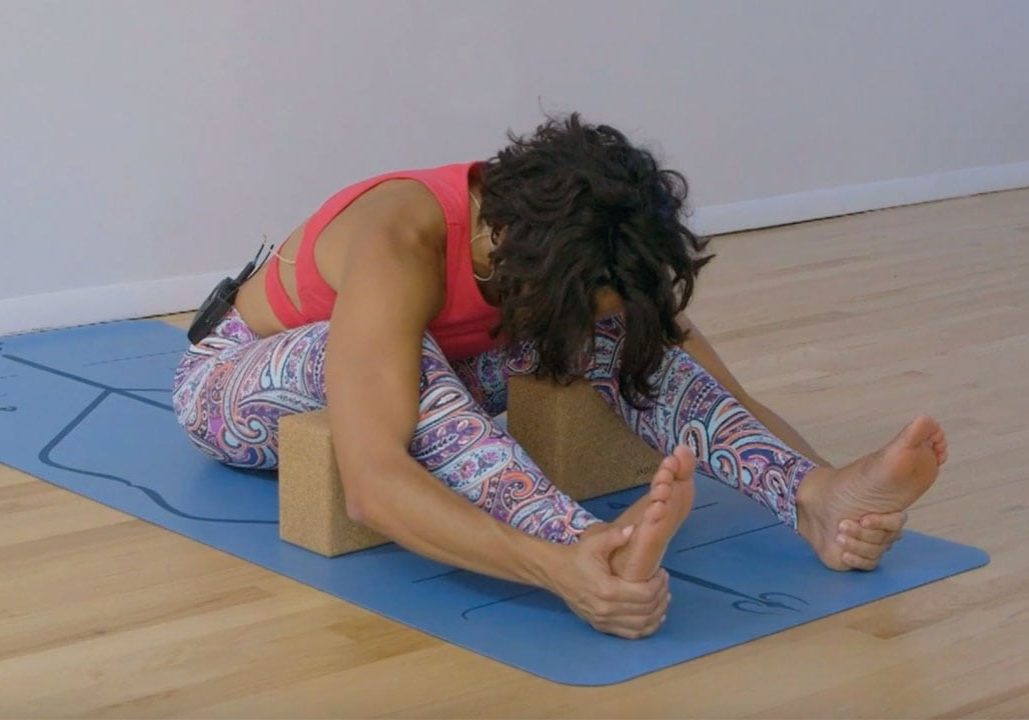
2. Paschimottanasana Modified With Blocks
Now that you’ve relaxed your nervous system let’s move into your first pose. Breathe deeply in each pose in this sequence to deepen your relaxation.
Sit on the floor with your legs out in front of you. Place yoga blocks at medium height beneath your knees. Rest your knees on the blocks.
Draw your belly in and fold forward grabbing your shins. Exhale and drape your body over your legs and relax.
If you can, hold onto your heels and draw your body forward even more. Don’t strain. This practice is to help your muscles soften and relax. Stay here for 30 seconds.
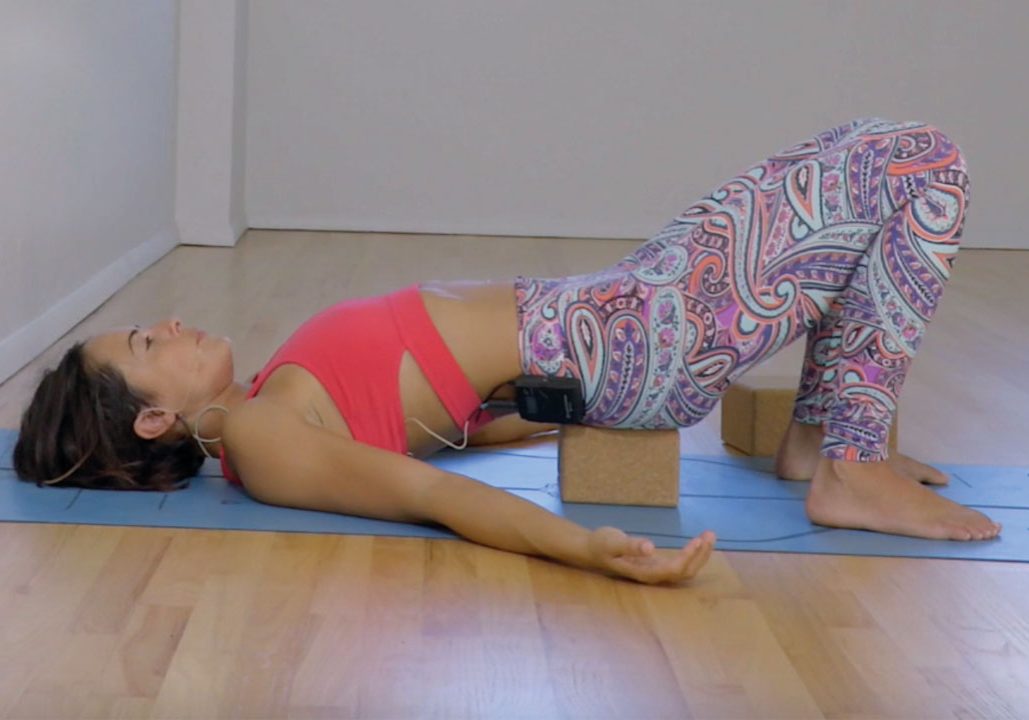
3. Setu Bandasana Or Bridge Pose Modified With Blocks
Next we’ll activate your parasympathetic nervous system which is responsible for putting your body in a restful state. We’ll do this in a modified bridge pose.
Lay on your back with your knees bent and the soles of your feet on the floor hip-width apart. Inhale and press your feet into the ground to lift your hips up off the mat. Place a block under your tailbone on the lowest level. Lower your hips to rest on the block. Draw your shoulders open.
If this feels good, stay here or if you want to lift your hips higher you can by adjusting the block to the second level.
You can stay here or you can press your hips up again and adjust the block to the highest level.
Stay in whichever position you choose for 30 seconds.
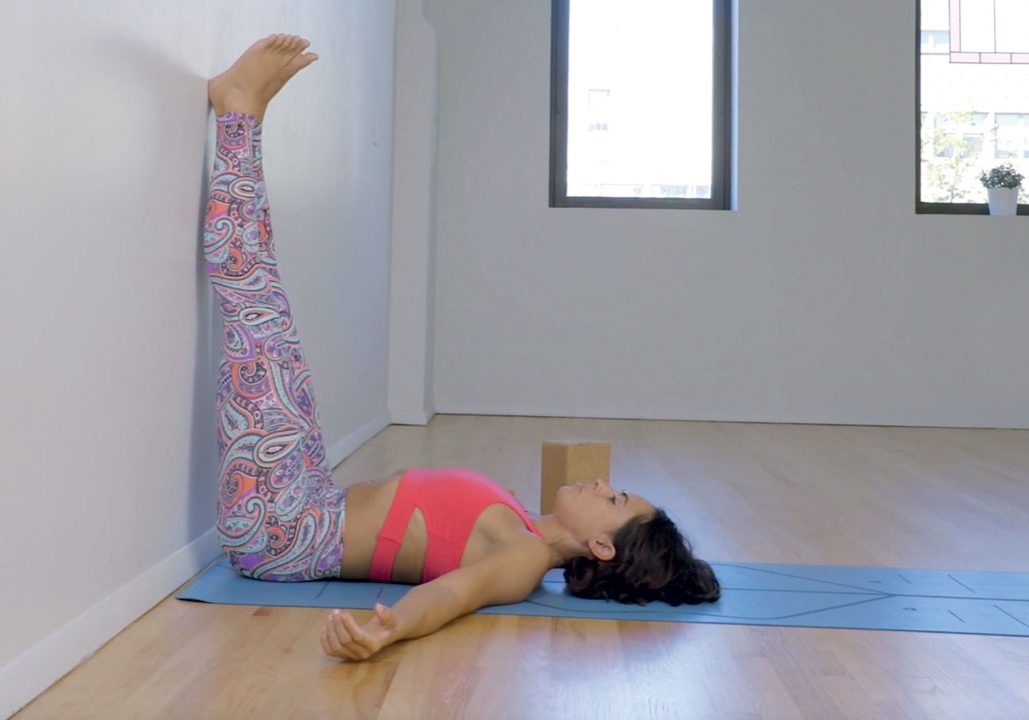
4. Legs Up The Wall Pose, Viparita Karani (Option 1)
This pose is good if you have high blood pressure or a migraine.
Sit as close as you can to a wall. Lay back and extend your legs up the wall. Scoot yourself in if you need to so your hips are nearly touching the wall. Your legs are together. Your feet are above your hips.
Stay here for 30 seconds or more.
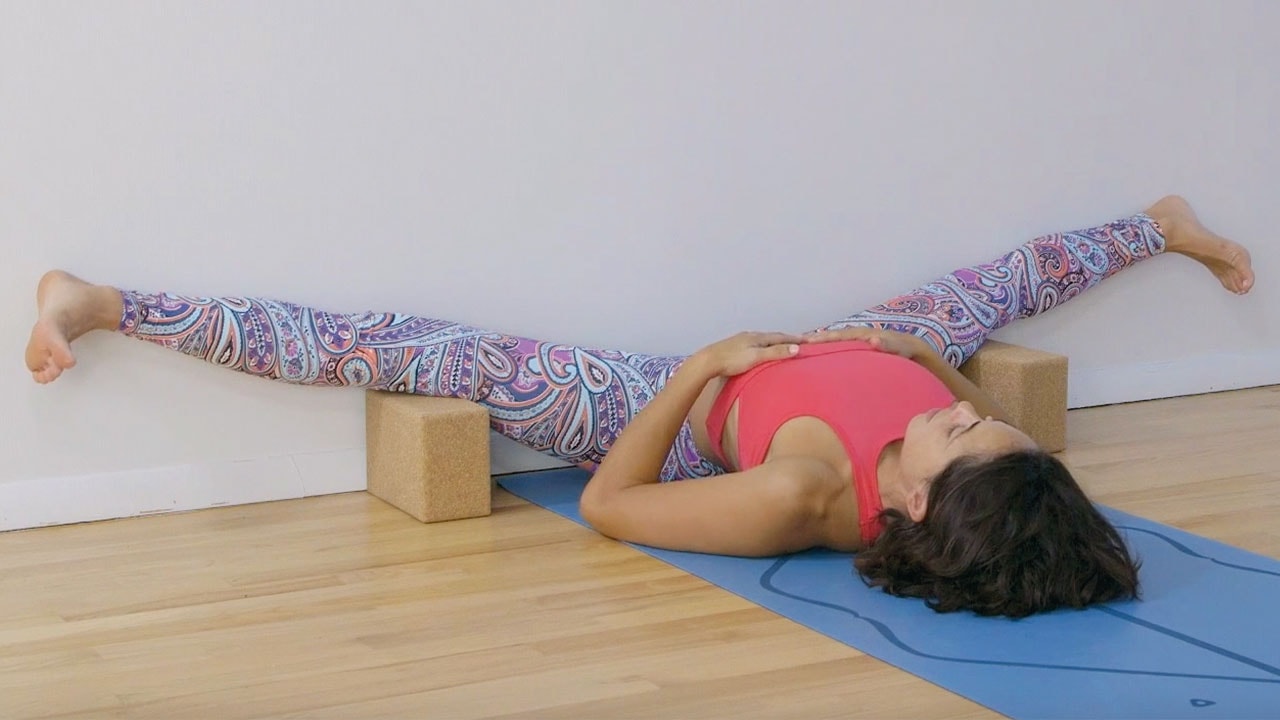
5. Legs Up The Wall Wide Leg Variation (Option 2)
Stay laying with your legs up the wall and let your legs fall open slowly. Position blocks under your thighs to give them some support. The blocks can be as high or low as you want them. You should feel a comfortable stretch. We’re not looking for anything intense here. Rest your hands on your belly.
Stay here for 30 seconds.
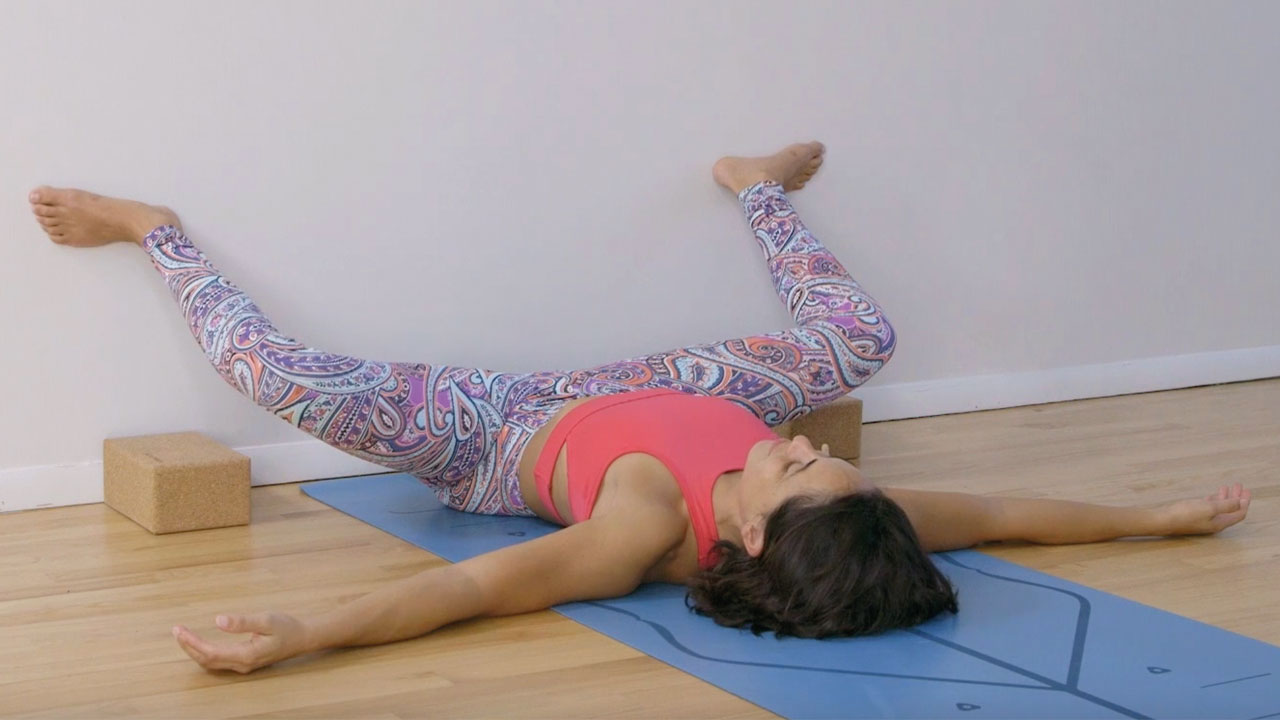
6. Restorative Goddess Squat
Now we’ll move into Goddess Squat while remaining on our back.
From the previous position use your hands to support your knees as you hug your knees in. Put the soles of your feet on the wall. Inhale and lift your sacrum up so you can move your hips about six inches back from the wall. Turn your feet so your toes are facing out and your knees are bent. Place your arms and hands wherever they are comfortable.
Stay here for 30 seconds.
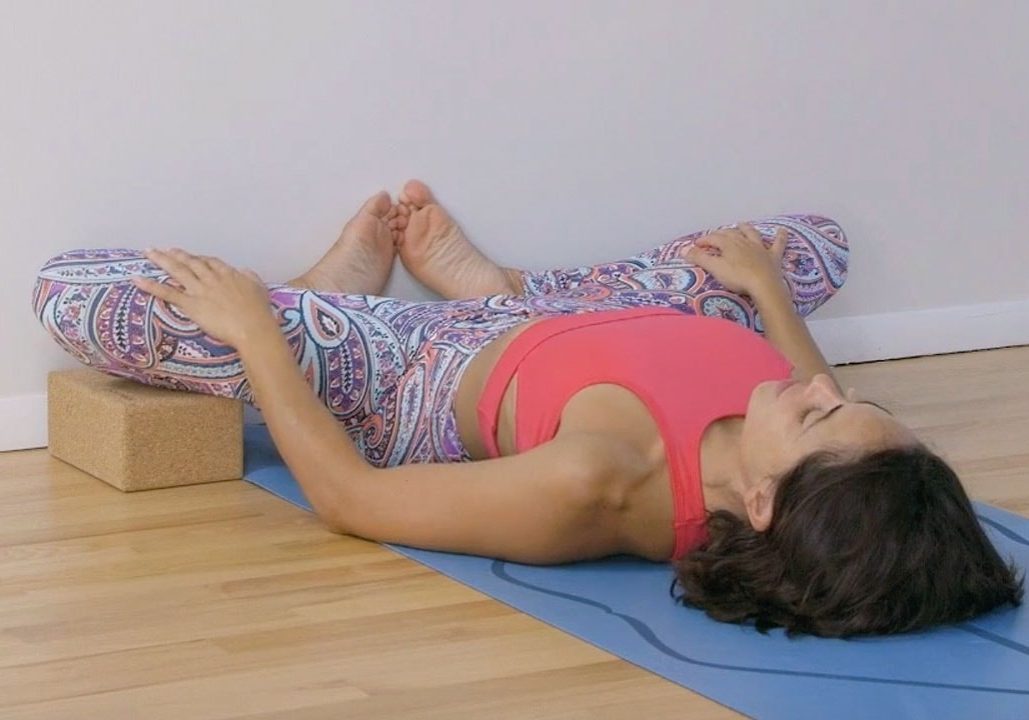
7. Restorative Badokonasana
From your restorative Goddess Squat bring your feet together so you are in Badokonasana or butterfly pose. Put the blocks under your thighs again for added support. Put the blocks on any level that feels comfortable for you. Again we’re not looking for an intense stretch here. Stay here for 30 seconds.
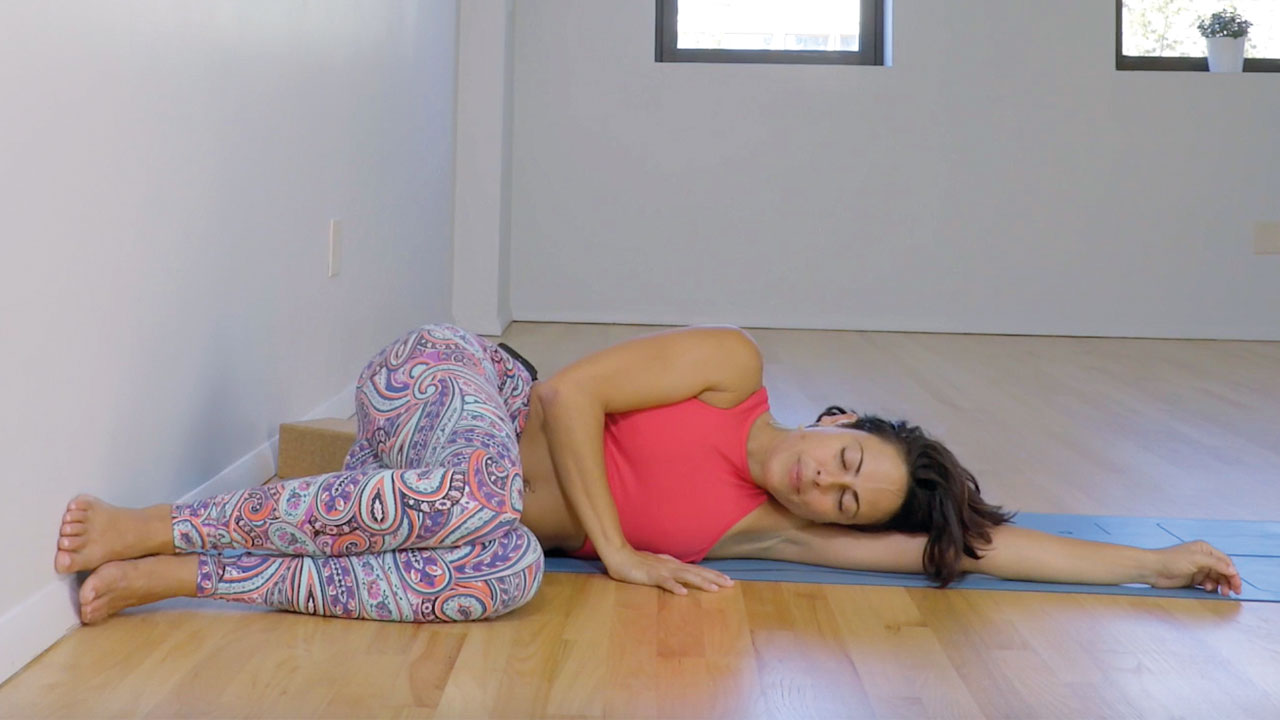
8. Restorative Supine Twist
Now we’ll use a restorative supine twist to move out of our previous pose and prepare to sit up again.
Put the soles of your feet on the wall with your knees together and bent. Exhale and bring your legs slowly to the floor on your right side. Now roll your torso over onto your right side too and rest your head on your arm. Stay here for a few moments breathing deeply before sitting up.
You can follow along with the 15-minute video below to get the full benefit of this restorative sequence.
Find Marie Belle on the omstars website where you can access her recorded content as well as weekly live classes, free for members:omstars.com/hosts/marie-belle-perez-rivera or follow her on Instagram @mariebellepr


