Accessible Ashtanga
Connect with your solar power this winter! An Ashtanga sequence in the sunshine by Emma Conally-Barklem
This sequence is based on the Ashtanga Yoga Primary series or Yoga Chikitsa which means ‘yoga therapy’. Far from being an elite gymnastic boot camp, as it is sometimes perceived and taught in the Western world, this style of yoga is a healing tool to promote good health through the generation of Prana (life force energy) and self-acceptance whatever body or circumstance you are in. If you stay connected to the principle of Ahimsa, treating your body with kindness and respect, then you can’t go far wrong in this practice.
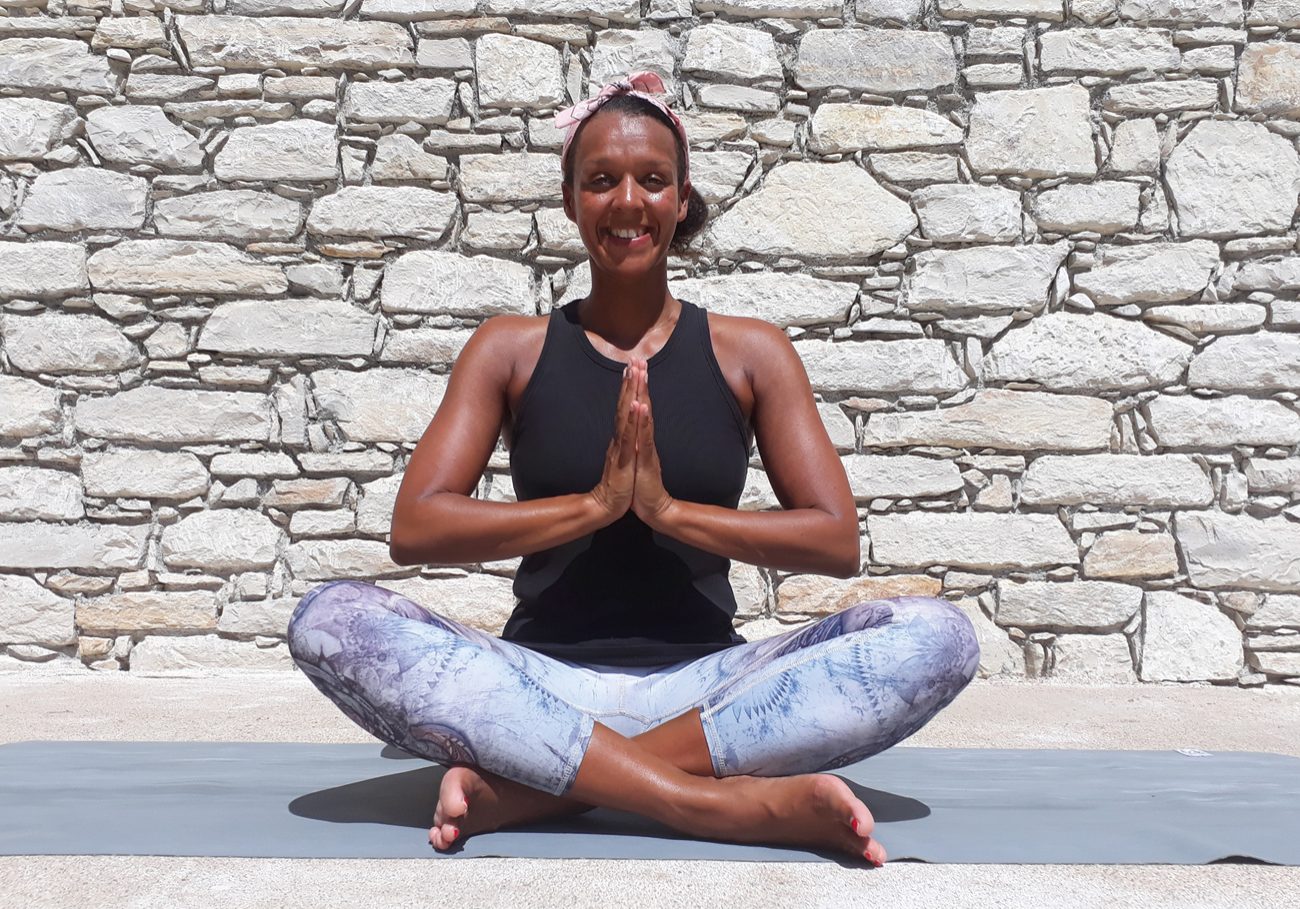
1. Sukhasana with Anjali Mudra
Begin in a comfortable seated position. If this posture bothers your knees you can stretch your legs out or sit on some support. You could start with some seated Sun Salutations (Surya Namaskar A and B) which is a great way to warm up your system and assess the situation for today’s practice. You could move to high kneeling or standing as you begin to warm up.
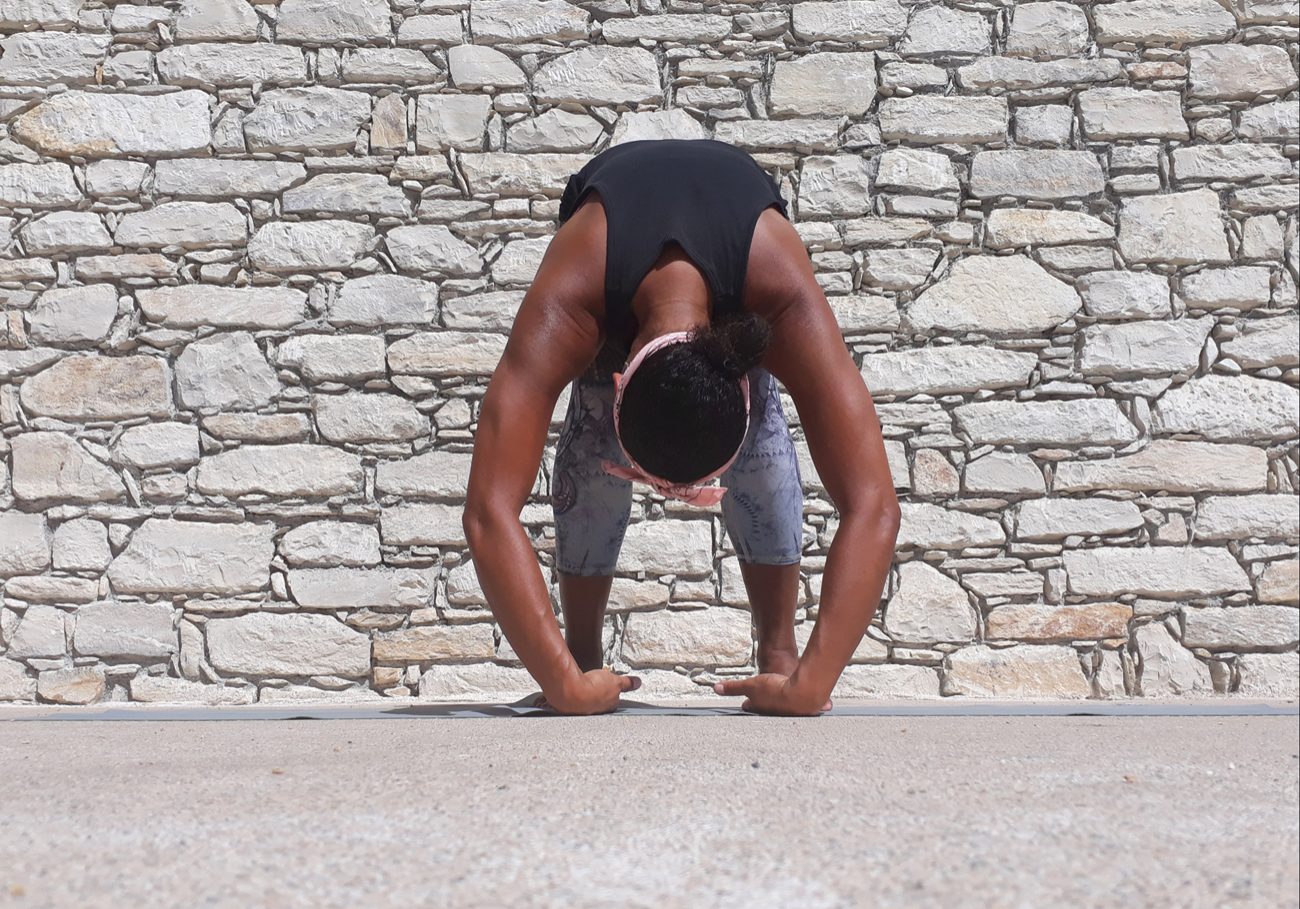
2. Padahastasana
Come to standing. Take the feet to hip distance apart and bring your hands firmly to the waist. Exhale to fold. Slide the hands under the feet or come to ‘cave man’ hands with the knees bent.
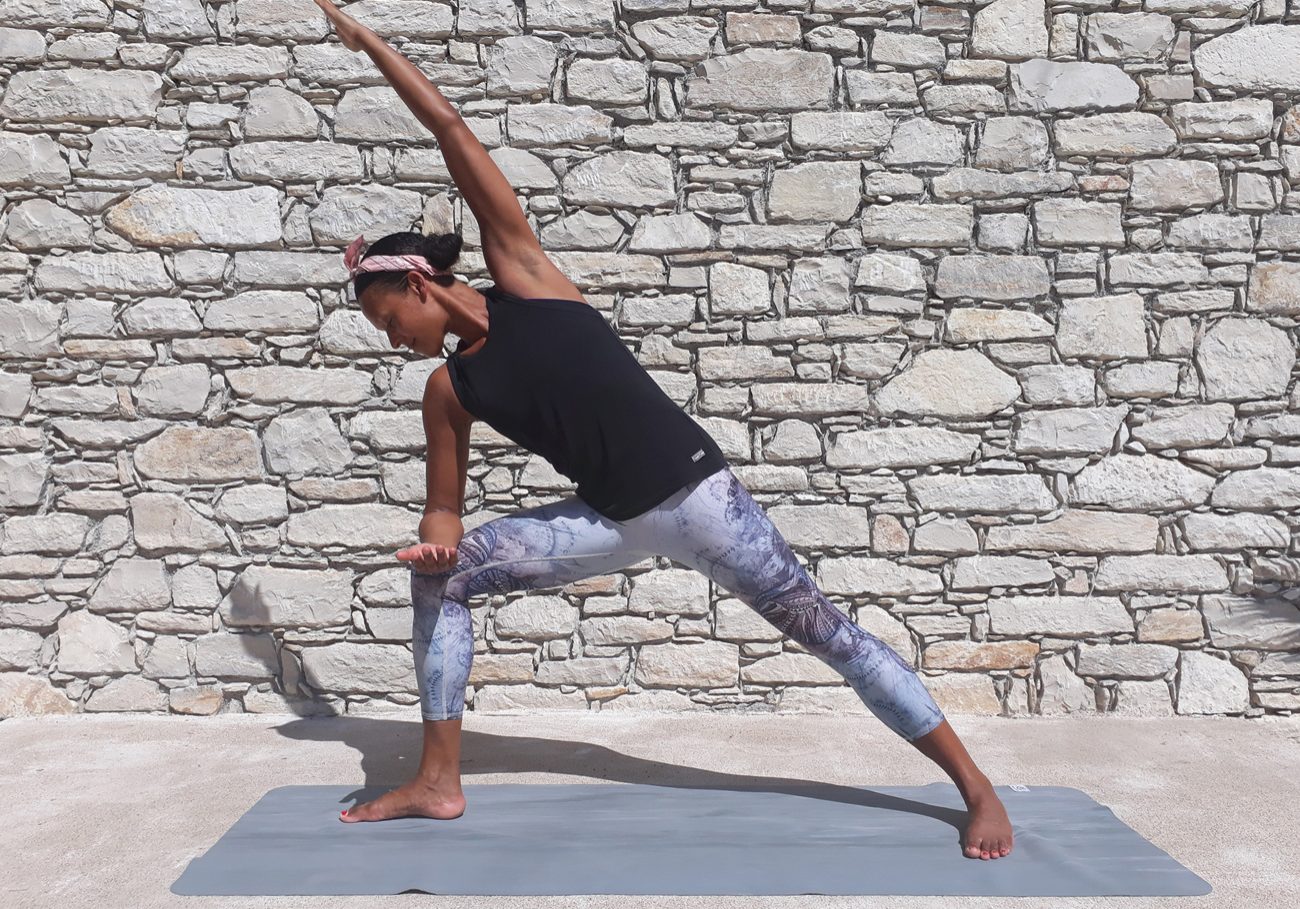
3. Utthita Parshvakonasana modified
Inhale and step out to the right and turn the feet in the same direction. Exhale and bring your forearm to your thigh as you swing the other arm through creating opposing forces as you ground through the back heel, reach through the fingertips. Glide your gaze to look down. Repeat to the other side.
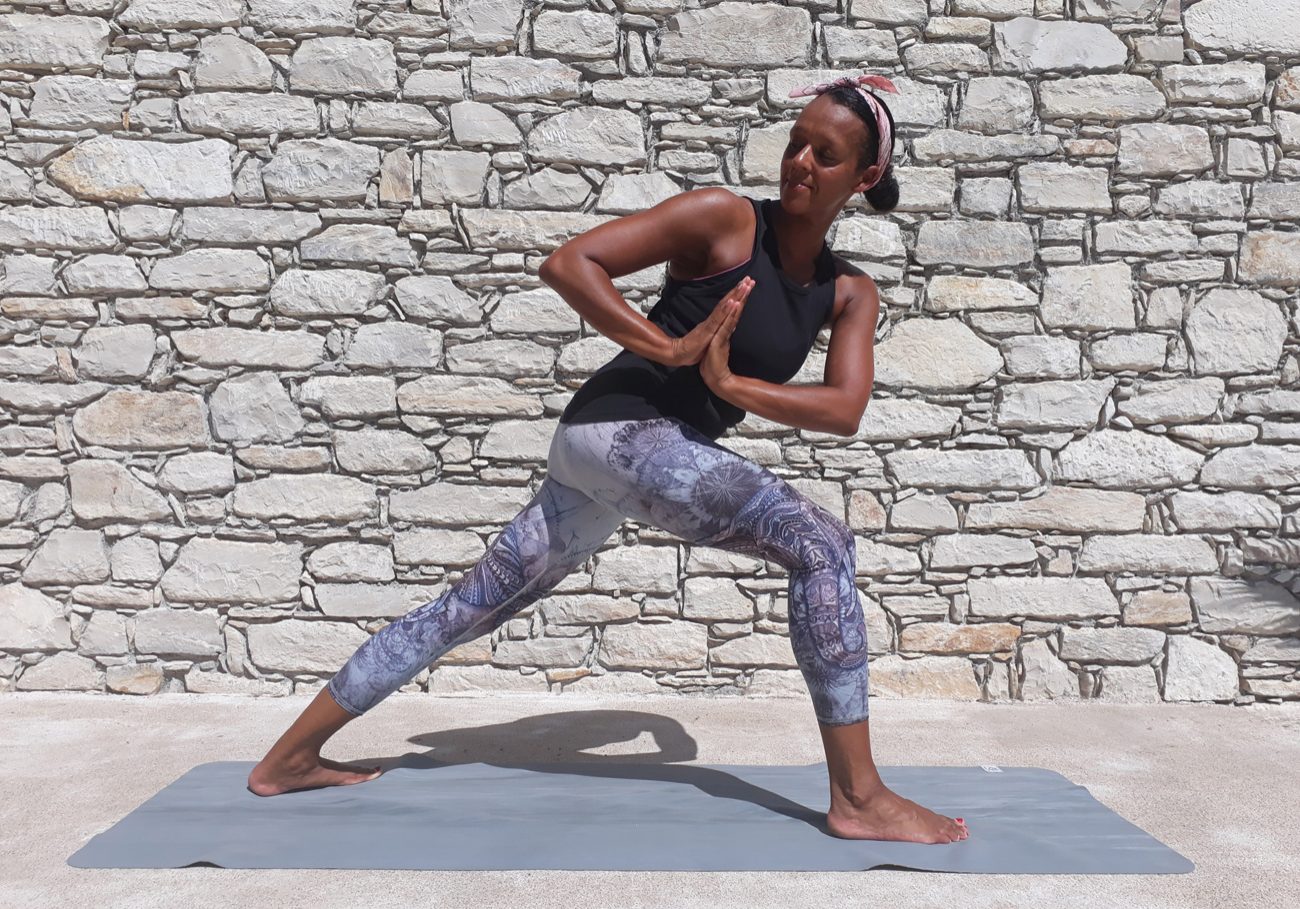
4. Parivritta Parshvakonasana modified
Inhale up and change direction again. This time lean forward and bring the hands to Anjali mudra at the heart space. Lift the chest towards the thumbs as you broaden across the collarbones. Inhale lift up then repeat to the other side.
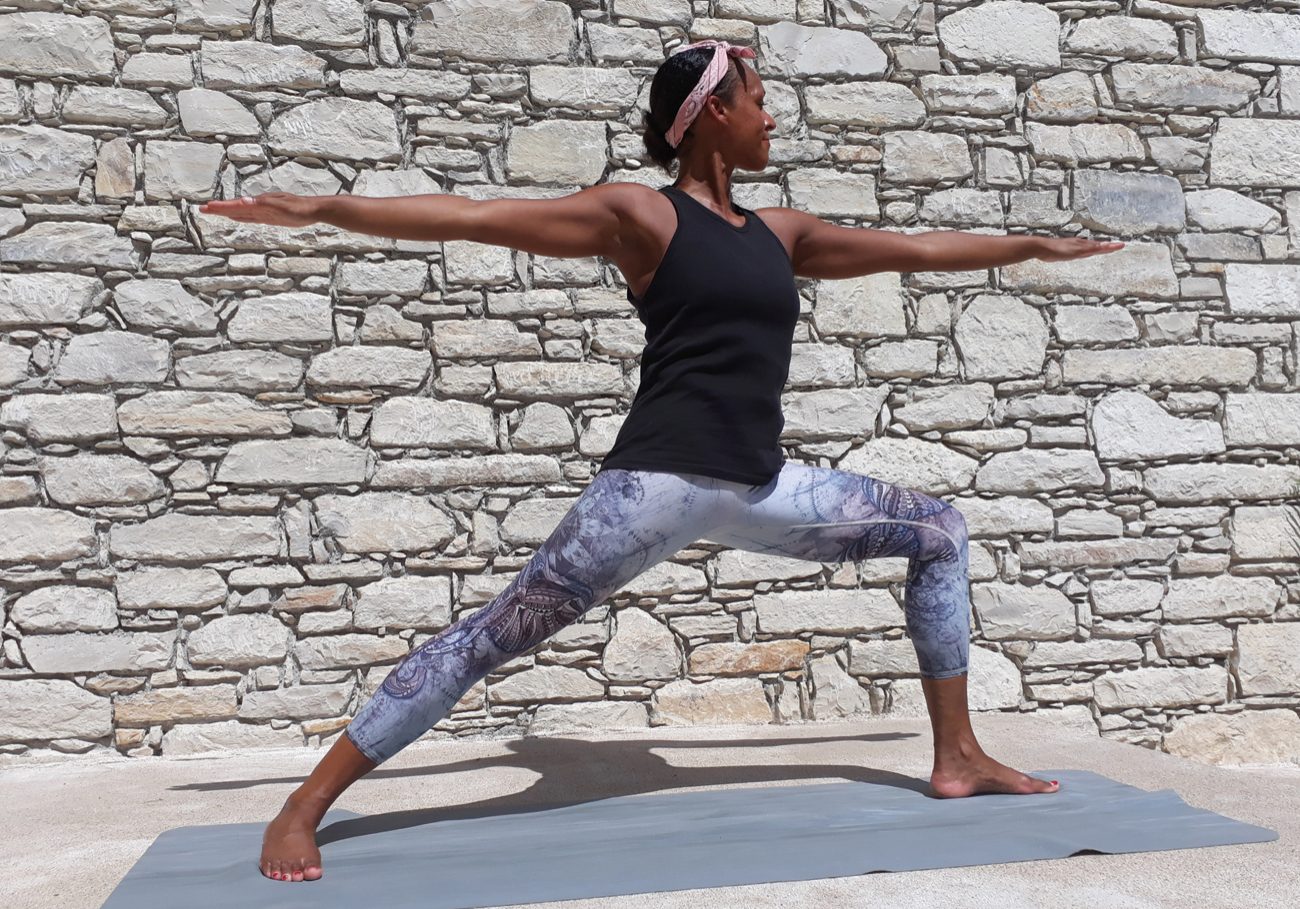
5. Virabhadrasana B
Inhale step out to the right and take the arms to shoulder height. Relax around the shoulders and lift the heart space as you gaze down the longest finger and beyond. Inhale lift up and exhale to repeat to the other side.
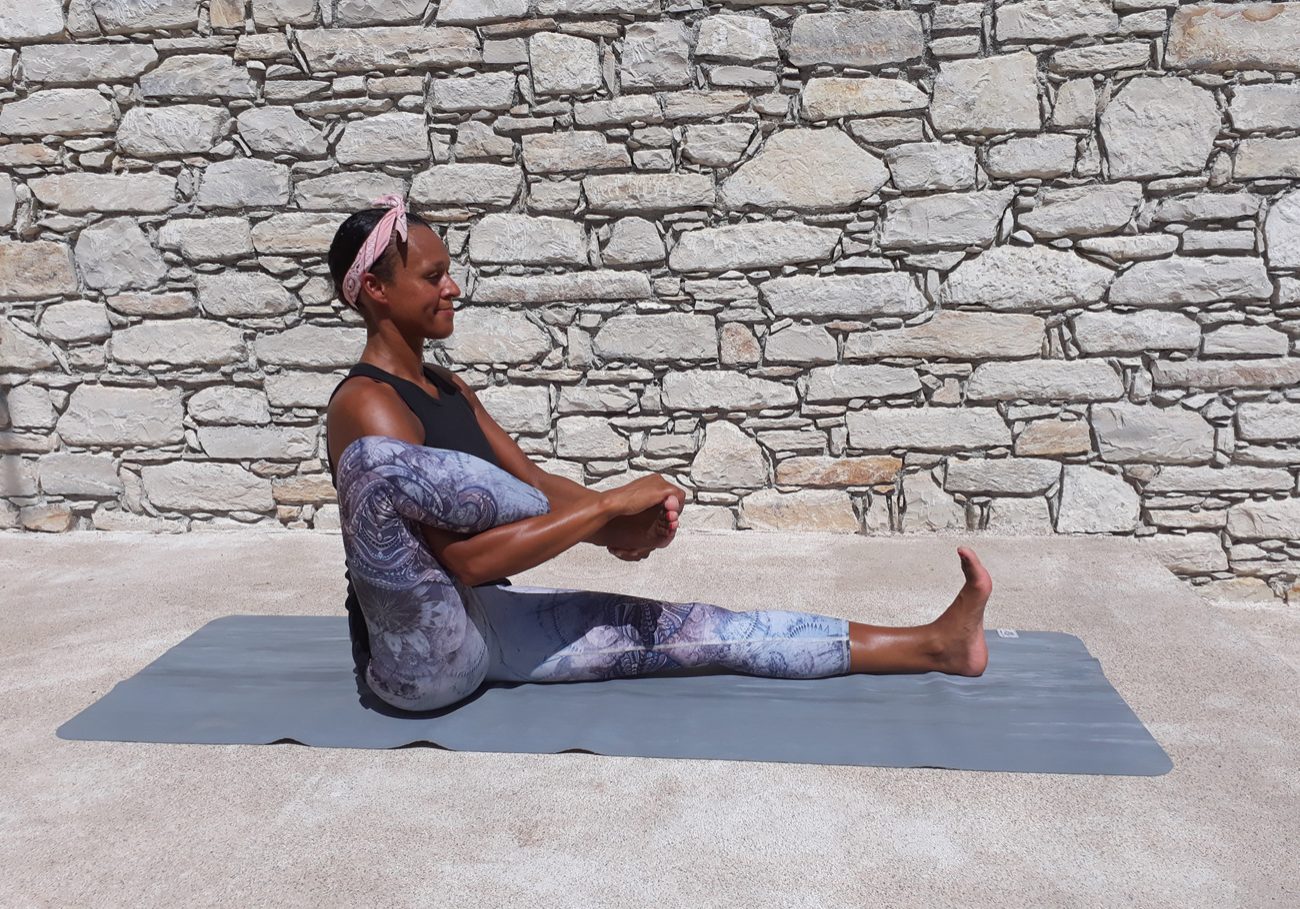
6. Janu Sirsana C preparation
Sit tall out of the sitting bones and lift through the crown of the head and the heart space forward. Extend the left leg out with active toes. Bend the right leg and thread the right arm under and over the leg taking hold of the foot or the ankle. You can support the left knee in the left hand. Repeat to the other side.
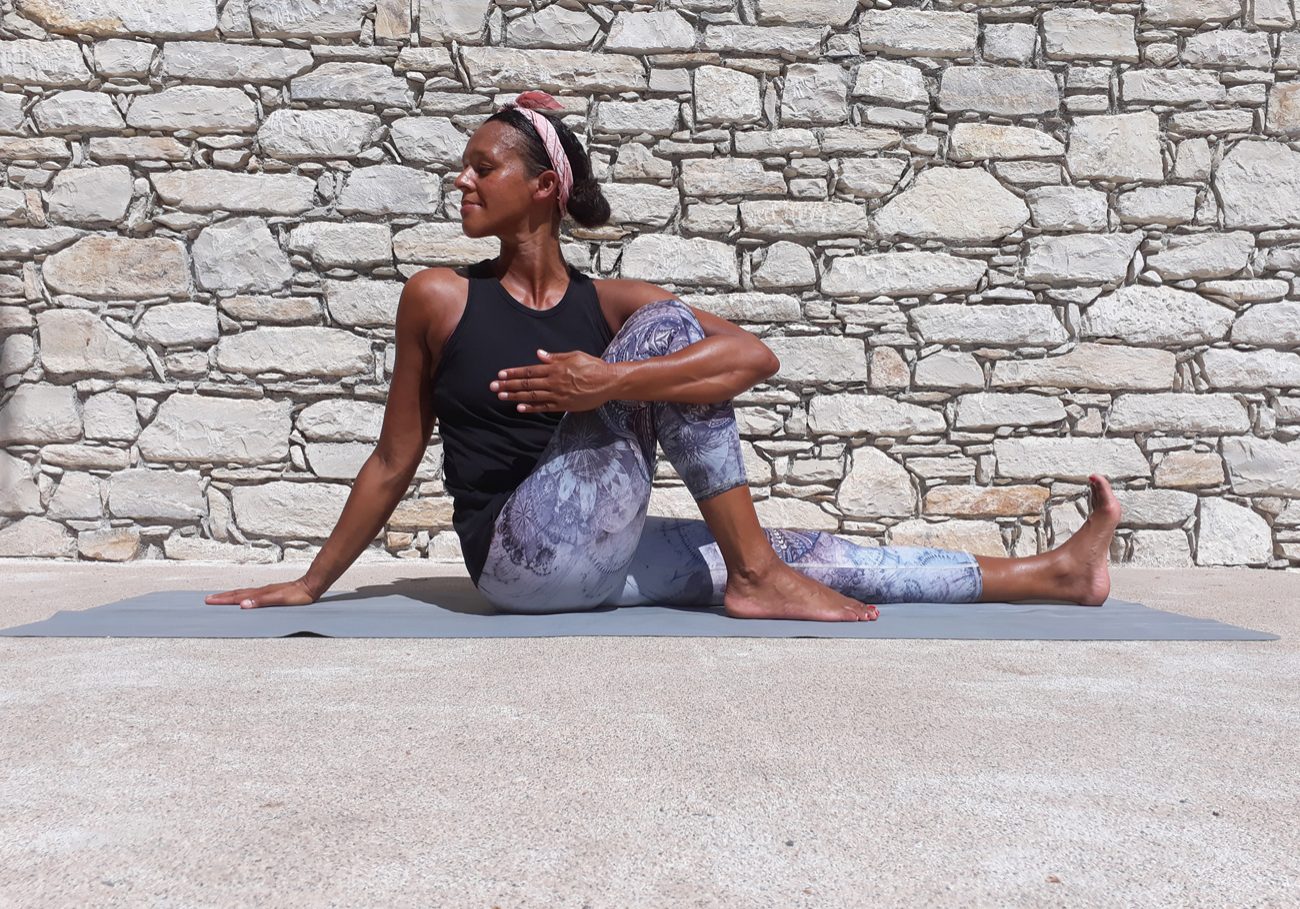
7. Marichyasana C modification
Sit tall and extend the left leg out. Bend in the right knee. Take the right hand behind you for support and hook the crook of your left elbow around the right knee. Use a ‘scoop through’ action as if drawing the right knee forward with the inner elbow and this will take you gradually in to rotation on your right side. Gently roll the right shoulder back on the exhale and see where you can soften in to the twist. Inhale to come to centre, exhale. Change sides.
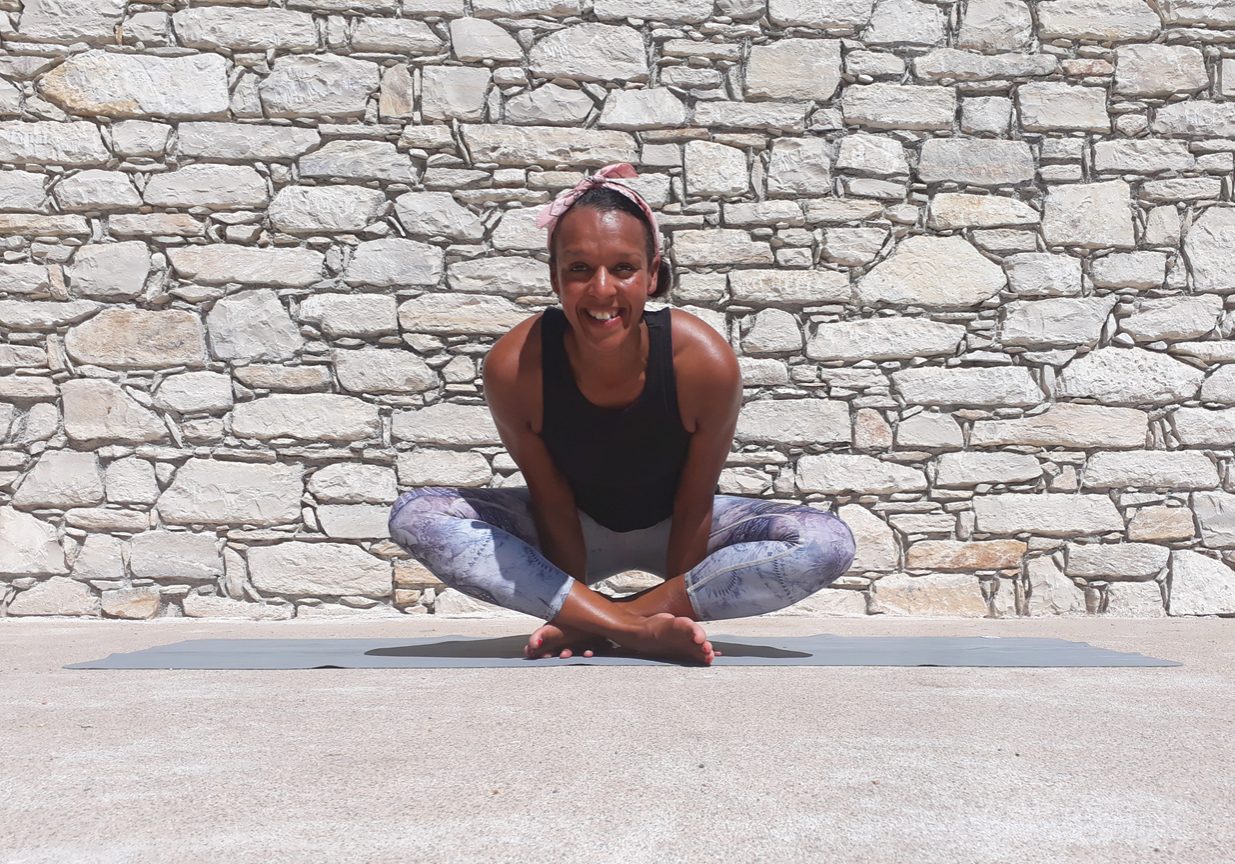
8. Kukkutasana modification
From seated, cross at the ankles then see if you can lift the feet away from the floor and bring the hands flat to the mat under the feet. Engaging the bandhas begin to rock back and forth until you may be able to lift on to the hands and look forwards. It can take a while to get this but it is fun to practice and accessible for those who want to try a fun posture without the demands of a full lotus position. Optional ‘cock-a-doodle-do!’ if you achieve lift-off!
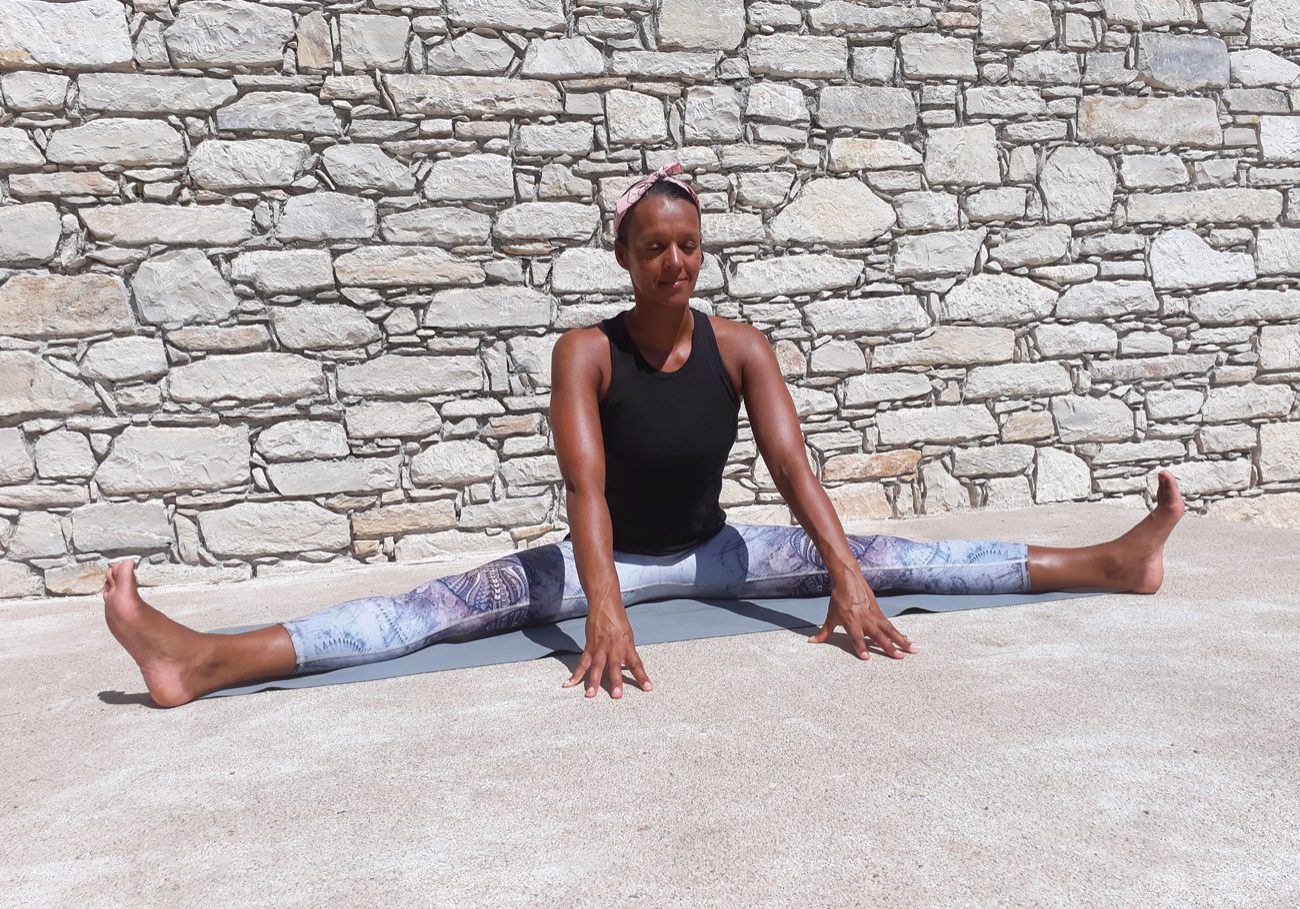
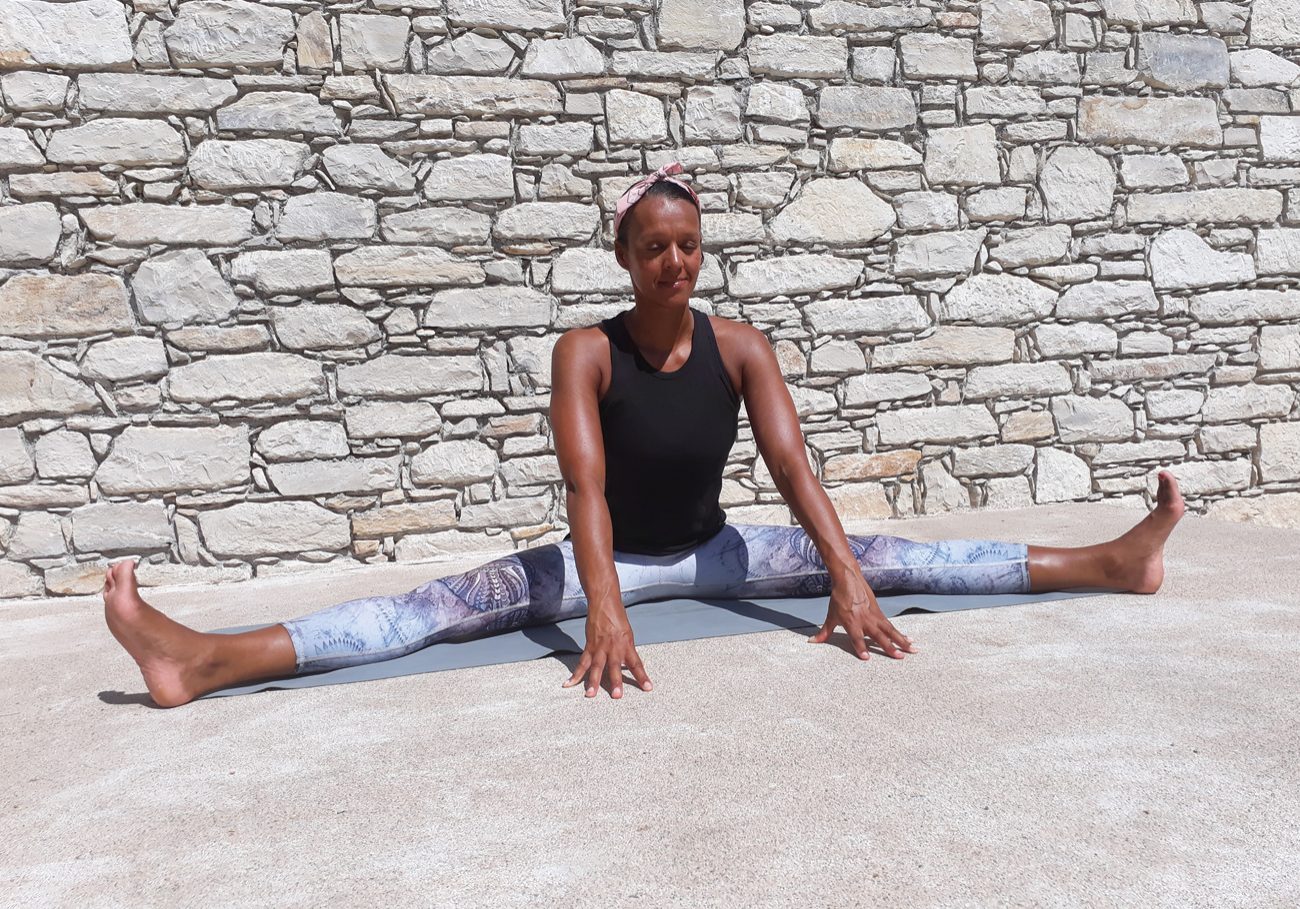
9. Uppavishta Konasana A modified
From seated, extend the legs out as wide as you can comfortably sustain and keep the toes active. Sit tall, inhale and lift the heart space forward, bring the fingertips down and roll the shoulders back. As you run in to the hamstrings soften around the knees and repeat the mantra: ‘Inhale to lengthen and exhale to let go’ . This helps cultivate patience and acceptance of where you are and also for the mind to let go of the suffering of striving.
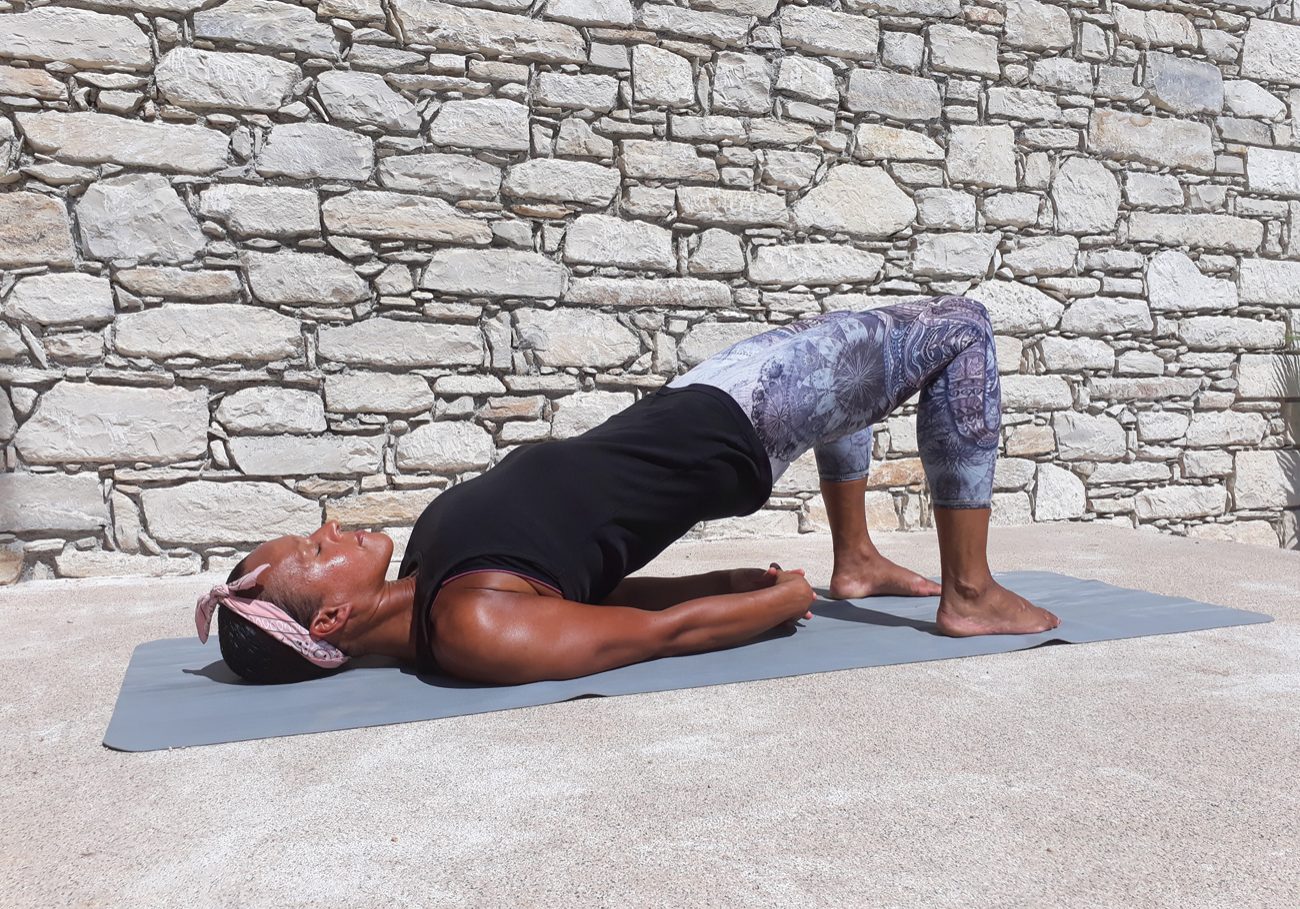
10. Urdhva Dhanurasana preparation
Come to laying on the back and actively relax the shoulders on the exhale. Have the feet hip distance apart and the feet a little forward of the knees. Press firmly in to the heels and tilt the pelvis towards you as you peel the lower back away from the mat maybe higher. Feel the shoulders heavy, the back of the neck long and keep the inner thighs parallel. If it feels appropriate for you, continue to lift the heart space skywards and roll the shoulders underneath the back, clasping the hands. Breathe deeply then come down mindfully bead by bead of the spine. Repeat a maximum of three times. This is an excellent preparation for an eventual full wheel or maybe you will stay happy with this modification building strength and flexibility gradually over time.
11. Halasana modification
As you feel the welcome draw of gravity in this supine position, you may lift your pelvic floor and catch your hips in your hands. Feel the weight distribution through your shoulders and ‘squeeze your walnuts!’ Imagine a walnut between your shoulder blades and squeeze; this helps to keep your neck away from the mat. Find the rhythm of your breath and lower the legs in the direction of the face. You can always stay grounded and make a similar shape with the legs in space but bending at the knees for comfort.
To close your practice, come to a well deserved Savasana or rest position of choice. Take three deep breaths or sighs out of the mouth. Allow the body and mind to drift towards stillness so the healing Prana can travel to wherever it is needed the most.
Roll to one side, come to seated and enjoy your day.
Emma Conally-Barklem offers free YouTube classes at: EmmaLiveYoga or to discover more visit: emmaliveyoga.com
Photos: Dr Zuzana Bajuszova


